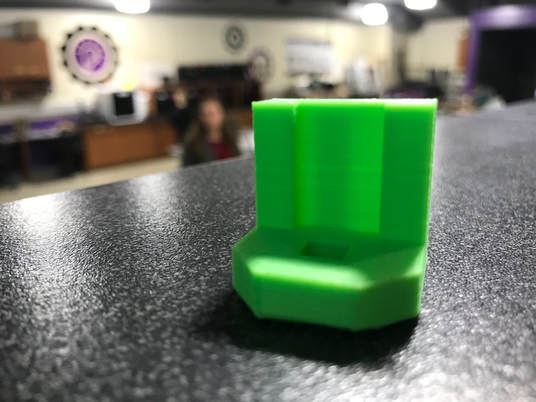
Step-by-step for widget 6
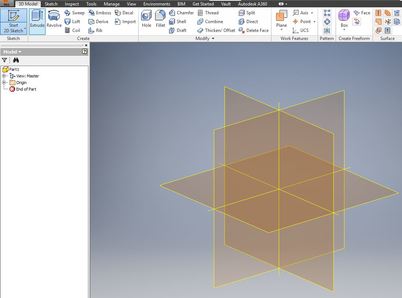
First, select start 2-D sketch and click on the plane showed to the left.
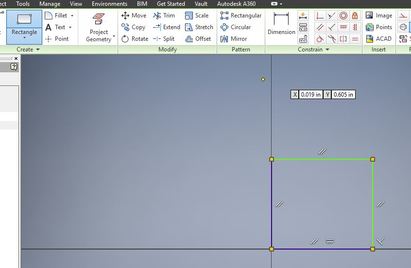
Once you've clicked on the plane, make a rectangle by choosing that option on the tool bar. Change the dimensions of the rectangle by clicking dimensions and then selecting the right side line of the rectangle then the left side and then clicking in a space above the rectangle. Enter 1 inch for the dimension measurement. Do the opposite for the width dimensions and click the top line, then bottom line, then the space to the side of the rectangle. Enter 1 inch again for the dimensions of the rectangle. It should be a 1 by 1 box.
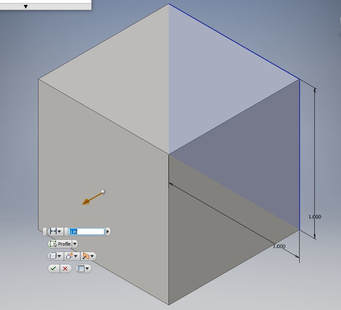
Click on "finish sketch" then extrude the rectangle 1 inch outwards.

Click on one of the sides of the box and make a .75 by .75 rectangle; extrude that in the inwards direction 0.75 inches by clicking on the "orange wall" box on the right shown in the picture on the left.
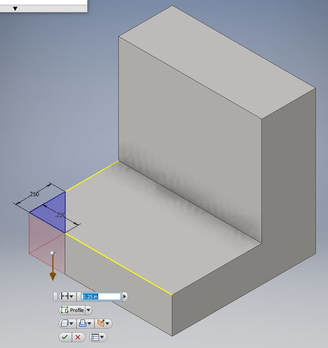
Click on the bottom section and make a triangle to extrude downwards 0.25 inches by drawing a line across making both sides of the triangle .25 inches. Do this to both sides of the base of the widget.
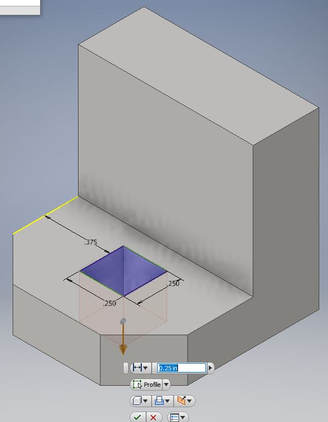
Sketch another rectangle in the center of the base with dimensions 0.25 inches. Extrude inwards again 0.25 inches.
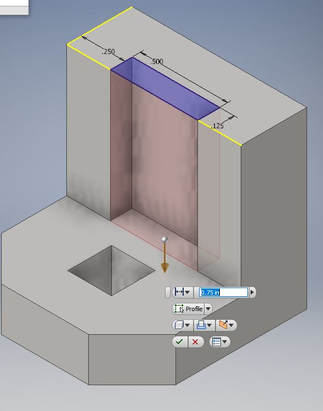
Click on the top section of the widget and make a rectangle with the dimensions 0.5 by 0.125 as shown in this picture. Extrude it down to cut it out 0.75 inches.
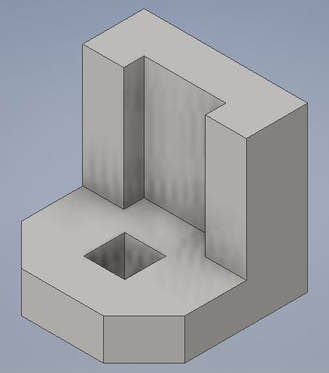
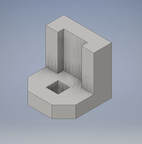
The final sketch should look like this:
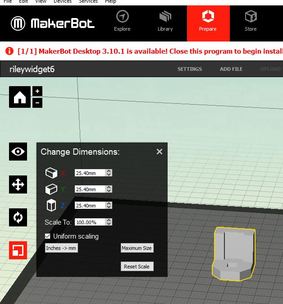
Upload your saved widget sketch from inventor into the MakerBot program on the same computer. Select the bottom box highlighted in red as shown on the left, and change the dimensions to 25.4 mm for each side of the figure. Make sure your widget is on the flattest surface so that when it is printing it is stable when building up material.
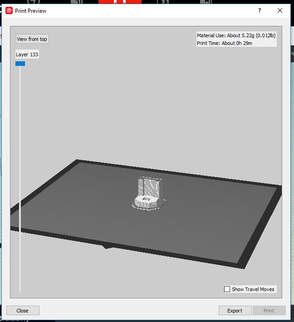
Go to file, print preview. If the widget looks ready to print, select export. Upload the file on MakerBot onto your flashdrive. Then, bring your flashdrive down to the Innovation Center and plug it into the printer.